Showing posts with label Clean. Show all posts

Tuesday, October 16, 2018

Benefits of Steam Clean Dryers & 3 Different Cycles

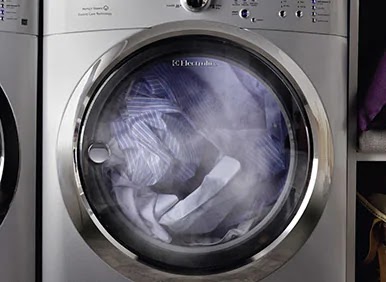
Steam dryers have some great benefits and should be considered when looking at new machines. Normal dryers use heat to dry clothes and allow the moisture to evaporate out of the clothes.  With the steam option, water is sprinkled into the dryer throughout the cycle in the form of steam. The steam can help reduce wrinkles and remove static  by softening the fabrics . Another great benefit is that steam clean can sanitize fabrics reducing orders and bacteria. There are a couple of different types of steam cleaning and steam can be used in different ways on your fabrics.

Where Does the Steam Come From?
The steam options on dryers either hook up easily to your existing plumbing. For most brands, all you need to do is buy a steam kit and install it. The steam kits usually include a tee connector, a short braided water line, and a longer braided water line.  The steam kit just hooks into the cold water faucet that your washer uses.  Some brands have a water reservoir that you refill before each load. 

3 Types of Steam Cycles
The different manufacturers will call their cycles something different, but these are roughly the different types of steam cycles. Some newer models might even have additional cycles and options.

1. Steam Dewrinkle: This cycle introduces moisture back into the dryer if clothes are wrinkled coming out of the dryer. This is really nice feature to use if you forgot to get the clothes out of the dryer after the cycle is done. You just turn your dryer back on and select this cycle and the steam will get rid of the wrinkles.

2. Steam Refresh: This cycle refreshes clothes. This cycle is used if you wear some clothing for short period of time and you don’t want do a full wash and dry cycle on it before your next use. Just stick it in the dryer and do a quick steam refresh and you are good to go.

3. Steam Sanitize: This cycle is designed to sanitize what can’t be washed. It can be used to sanitize items like pillows, toys, shoes, stuffed animals, and more.

Steam dryers adds more flexibility and options to your laundry needs. There's no need to worry about getting your fabrics freshened up before an important moment in your life with steam drying options.

Tuesday, June 19, 2018

Laundry Pedestal Options and More Innovative Technologies


Today, I would like to introduce the latest accessory innovations with the LG Side-Kick Laundry Pedestals and Samsung Flex Wash. But before we go into details, let's first start with the basics and explain what a pedestal is in the first place.


Traditional Pedestals
With front load washers, it can sometimes be daunting for people to bend down to place and remove laundry. Pedestals were made to make things a little bit easier.  A pedestal goes underneath the washer and dryers. It raises the appliances off of the floor of about 12-16 inches. This makes it easier to place and remove clothing inside the washer and dryer.  This will put less strain on your back by not having to bend down as much without a pedestal.

The other convenient thing about pedestals is that  it is a great storage area to make your laundry room not seem cluttered with it being in a drawer and almost blended into the look of your washer and dryer. You can keep your detergent, fabric softener, bleach, dryer sheets, and other supplies in here. 

Just remember that not all pedestals are the same and that you will need to make sure that you get ones that is the right size, shape, and color as your appliances.

You can find traditional pedestals in every brand of appliance. Find one for your laundry set here. or you can call one of our stores to make sure that you get the exact one that works with your washer and dryer. 


LG Side-Kick Pedestals
   This innovative washer mounts neatly beneath your LG front-load washer is a great alternative to the traditional pedestals. This pedestal option enables you to wash two separate loads of laundry at the same time.  This unique washer is specifically meant to handle your smaller, more delicate items in a smaller load.  You can now do a giant load of towels, and a smaller load of hand-wash items at the same time.

    This new idea can be a real time, water, and energy saver for you and your family when it comes to laundry day or when you need to do an emergency small load.

Take a look at theis LG SideKick Pedestal: WD200CW


Samsung Flex Wash
Samsung makes Flex Wash which is similar but is actually a 2-in-1 machine instead of a separate machine in a pedestal form. The Flex Wash has the small washer on the top of a front-load washer at a 1.0 Cu. Ft Capacity and can do faster cycles than a traditional washer and has the option of steam wash and dryer options.

Check out this Samsung model: WV60M9900AV.

See these options yourself at Appliance Factory & Mattress Kingdom. We can help you find the perfect pedestal option for you. We can take it  one step further by showing you the LG Side-Kick and Samsung Flex Wash options to optimize your washing and drying experience. Ask our team questions that you may have bout laundry and we can show you the best laundry innovations that are available and find one that fits your needs.

Give your laundry day a kick, with the new LG Sid- Kick laundry pedestal or become a little more flexible with Samsung Flex Wash. The choice is yours, but we can help you through the decision.

Tuesday, June 5, 2018

Why Buy a Top-load HE Washing Machine


Let’s start with the question what does HE mean? HE stands for high-efficiency in washers. In order for a washing machine to be considered high-efficient, it must follow meet certain criteria and guidelines in regards to how much water, electricity, and detergent it uses. Look for the HE symbol on the machine indicating that it uses less energy, water, and detergent.
HE washers can be found on front-load and top-load washers. Both HE washer styles are efficient with the clothes cleaning performance. Here is a look at why you should consider a top-load HE washing machine rather than a traditional top-load or front-load washing machines.
Better Cleaning, Less Water
Most HE top-loaders are better at cleaning, gentler on fabrics, quieter, and use less water than traditional agitator washing machines.
Lower Cost
Front-loaders, which is a newer technology and more popular, are usually your most expensive option. HE top loading machines give you the benefit of significant water savings as opposed to a standard efficiency top loader, at a fraction of the cost of front load HE units.
Larger Capacity
HE top-loaders do not have agitators which increases the capacity of the unit. You can do less loads of laundry by having more clothes in one load. An agitator top-load washer varies in sizes from 3.2 Cu. Ft. to 4.5 Cu. Ft capacity. A HE top-load washer ranges in sizes from 4.5 Cu. Ft. to about 6.2 Cu. Ft. capacity. Their extended wash cycles allow the machine to provide clean clothing with minimal water use.
No Vibration Problem
Top load HE units spin faster than standard efficiency top loaders leaving your clothes dryer with less time. Their final spin speed is significantly slower than a front-load unit, which decreases the possibility of vibration.
No Mold Issue
Unlike a front-load unit, the door does not have an air tight seal. By leaving the top open, and using an approved washer cleaner once a month, you can virtually eliminate the possibility of mold or mildew better than a front-load washer
ENERGY STAR Qualified
Because HE washers and dryers meet strict energy and water guidelines the machines are considered to be ENERGY STAR Certified. This can save you more money and energy throughout the life of your appliance.
HE washers and dryers are more common now, which makes them a little more affordable compared to when they first came out. They are still more expensive up-front than traditional agitator washers. With the many benefits of HE washers, it will save you energy, water, and time in the long run making it worth the upgrade.

Wednesday, May 2, 2018

How To Clean Your Washing Machine

Keith, one of our technicians, is here today to share with you how to clean and maintain your washer so that it will last longer and save you money.


Surprisingly, your washer needs to be cleaned frequently throughout the year. For front-load washers we recommend to clean it 3-4 times per year. If you do more loads, roughly once a day, we recommend that you clean it about 6 times per year.

Affresh Washer Cleaner and wipes are what we recommend to clean your washer. Especially for front load washers, bacteria can build up and cause your washer to smell and even have your clothes not clean as well.

For top-load washers, you do not have to clean them as often. This is because there is more open space by the lid for water to evaporate. You can use bleach to kill bacteria, but it won't actually remove the bacteria which is why using professional cleaners like Affresh is better because it will kill and completely get rid of the bacteria.

Let us know if you have any questions about cleaning your washer or other appliances. You can give one of our stores a call to order your cleaner today.

Friday, August 18, 2017

High Efficiency Top-load Washers vs Front-load Washers


Chuck Ewing, the CEO of Appliance Factory & Mattress Kingdom, is here to help you understand the efficiency in top-load washers and front-load washers. You will also find out which one is more efficient than the other. Watch the video to get information.

Top-load Washers
To get the highest efficiency, you need to use less detergent, less water, and less hot water. The washer will spin the cloths fast making clothes go up. This is not the most efficient way to wash your laundry.

Front-load Washers
Because the drum sits on the side, there is less water need to wash clothes. Clothes spin more evenly making sure everything gets wet. Because there is less need for water, you use concentrated detergent as your soap.


We hope that this video helps you make the best decision for buying your new washer and dryer appliances.

Let us know if you have any questions about efficiency in appliances. Leave them in the comments section.

Friday, February 10, 2017

To Steam or Not To Steam

In recent years steam technology in laundry has become the latest sensation. You may be wondering, what exactly does it do? The average consumer does not fully understand or even are aware what the benefits are. Some do not even know that it is an option. Here is an overview of what steam technology can do in washers and dryers:


Washers
  • Earth-friendly attributes boosts cleaning power with steam and it requires less water to do the job.
  • Steam washers utilize a combination of water and steam in a variety of cycles to for a better wash for your laundry.
  • Steam boosts the temperature inside the washer drum, causing fibers to relax and more efficiently absorb water, releasing deep-down dirt and stains.
  • Wrinkles are reduced by high-heat steam softening fabrics, which allows wrinkles, deeply embedded during spin cycles, to flatten out.
  • High temperatures will also sanitize clothing by reducing allergens, such as dust mites and pet dander.


Dryers
  • Steam dryers provide similar benefits to clothing steamers while the clothes remain in the machine
  • Steam setting also removes some resistant odors that wash cycles may not remove also helping to kill bacteria that cause them.
  • Based on that information a consumer can determine now whether or not steam has useful benefits for their situation and laundry needs.

Have we got you hooked onto why you should look into steam technology? Check out the LG
TurboWash Washer with Steam Technology now, but stop by and check out all the other washers and dryers that offer steam technology. 


Thursday, January 19, 2017

TOP LOAD VS. FRONT LOAD WASHER


So your washer has just run its last cycle in its long and prosperous life and now you are, for potentially the first time, shopping for a brand new one. You walk in to an appliance store and you see an overwhelming selection of washers to choose from. There are top load with the agitator, there are top load without the agitator in the middle, and finally there are front load washers. What is the major difference between the three? Well I’m here to answer exactly that.

Lets begin with top load washers with
agitators. This is your traditional washer set up and generally at lower price points. The first thing to mention is that very few top load washers are built in the old school manner where they will last 15 to 20 years. Most modern washers on the market going to last 8 to 10 years, regardless of set up. The reason they don’t last as long is because the savings on energy efficiency over the 8 to 10 years of its life is enough money to warrant purchasing a new set. The down side of this washer design is water efficiency while the benefit is you don’t have to bend down to put clothes in. A great example of a top load washer is the LG 5.7 Cu.Ft. Mega Capacity Top Load Turbowash Technology Washer.

The top load without the agitator in the middle is a curious study. The lack of the agitator in the middle to pull clothes through the water to clean them means that the manufacturers had to get creative with the way the tub rotates. The benefit of these is that your clothes can’t get tangled around the agitator or get frayed, plus the capacities tend to go higher on them as well. The downside on them is water efficiency.

Now we get to the front load washers. The number one complaint I’ve heard customers have is that they tend to develop a smell over time. The manufacturers have fixed that issue by using anti-microbial material on the interior of the washer. The other thing to keep in mind is that front loads require ventilation, so keeping the door cracked is necessary. Now front loads are the best at cleaning clothes and here is why, the tub will spin out much faster than the top loads plus the tub itself is stainless steel on the interior. Now while they are generally more pricey, the amount of water savings you will have on front load vs. top load will pay itself off in two to three years. Check out the LG 5.2 cu.ft. Mega Capacity with On-Door Control Panel & TurboWash.

So in general, front load washers will clean the best and are the more efficient. The downside is having to bend down to load and unload, but they do have pedestal or stacking options. 

Thursday, December 29, 2016

The Benefits of a Mattress Protector

It amazes me in my line of work how many individuals are willing to purchase a mattress, and are not willing to invest in a mattress protector. When you think about it, the average person spends one third of their life in bed. The average person also looses about a half gallon of fluids as they sleep through evaporation. Where does all of that water go? It goes into the air, into the mattress, and a combination of both. As gross as that is to think about, consider what that does to an unprotected mattress.
There are numerous benefits to putting a mattress protector on your bed and the cost to invest is really not that much. First and foremost, a mattress protector will ensure that your mattress will remain free of bodily fluids and even dead skin cells, extending the life of the mattress. The second thing a mattress protector will do is ensure that your 60 or 120 day sleep guarantee is guaranteed. The importance of having the sleep guarantee is to ensure that you’ve picked out the right mattress for you. You would hate to be stuck with a mattress you don’t like just because you opted out of getting an affordable mattress protector. 

Not all mattress protectors are created equal. Some mattress protectors do their job, but also block out the cooling effects of some of the higher quality memory foam mattresses. The mattress protectors we offer are very thin and are guaranteed to be water proof and skin cell proof. The best of our protectors also have a cooling system built in so that you can enjoy cooling effects without paying top dollar for a mattress that does the same thing. 

Saturday, December 24, 2016

5 Washer Tips That Will Save You Money & Time

Watch the  video before using your new washing machine. These tips will help you prolong the life of your washer and dryer, and ultimately save you money and time.


Here is a recap:
1. Make sure to use correct type of detergent.
2. Check your pockets before washing.
3. Air out the machine by keeping the doors open.
4. Check your hoses to avoid leaks.
5. Listen to your machine for rattles.

Now that you know these steps before buying a washer, stop by one of our 16 locations to pick out the right washer and dryer for you and your family.

Friday, September 9, 2016

3 Things to Consider When Purchasing a Dishwasher

Are you in the market for a new dishwasher? Chances are you have many, many questions and there just seem to be enough clear answers. In this modern age there’s a buying guide to pretty much everything, however, when it comes to something as essential as dishwashers the internet is filled with specs, and technical details that read like a foreign language.

At Appliance Factory and Mattress Kingdom we’re experts in simplifying the appliance shopping experience. We take industry jargon, that’s designed to fill spec sheets and make them practical and easy to understand and digest. We want to prepare you with the tools to make the most rational decision and not rely making a decision from a sheet of specs that we see too much in the market.
We’re confident these three practical tips to consider when purchasing a dishwasher;  will help you prepare in making the best decision possible. PS: We can’t wait for you to come in and show off how prepared you are; we have 16 locations find the one closet to you here.


1. Price or Performance:
This is a question you must ask yourself before you walk into a store, or begin shopping online. This simple question will really help clarify what you’re looking for and ensure you don’t buy anything you don’t need. That’s the last thing you want is to pay more for a feature you don’t need. And trust me there are a lot of different features out there, that’s one of the primary factors that can drive the price of a dishwasher from $349 to $1600.


2. Do I Know My Space:
Many resources start with measurements, meaning that measurements are the most important factor in deciding or selecting a dishwasher. While measurements are important, you’d be shocked how many people walk into one of our 16 stores or chat with us online and have their measurements; but have no idea the other appliance brands or colors in their kitchen. Yes, measurements are extremely important but knowing the goal for the space is extremely important:
  • Do I want to match the brands in my kitchen or am I open to other options?
  • Do I want controls on the front, or do I want controls hidden to have a more concealed look in my kitchen?
  • Is my current dishwasher panel ready, do I want to stay panel ready or do I want a solid color?
  • Is my kitchen open to another room, how important are noise levels?
  • How many place settings or pots and pans, or silverware do I want to fit into the dishwasher?
  • Those are just a few questions to get your mind ticking. There are many more, so get pots and pans out, bring your favorite wine glass to the store with you, etc… Your space is your life, knowing your space will make sure you find a dishwasher that fits your life.


3. Read a review or two:

It really doesn’t matter the manufacture or model, just read a couple of reviews on dishwashers. Trust us there are thousands of them on the internet. This is great for you, because you can see what other shoppers are saying about their purchases. Pay close attention to reasons they don’t like their dishwasher and reasons they do. If you’re price conscious  read reviews on entry-level models and then compare the mid-level models. Chances are some of these reviews will help you discover questions that are really important to you that just hadn’t crossed your mind. 

Thursday, May 26, 2016

Ewww- What’s that Closet Smell?

It’s happened to all of us- on the first warm day of spring, we go to put on that fun summery sundress or pair of linen pants, only to discover that musty, “closet-y” smell emanating from us shortly thereafter. Even if you launder your clothes before hanging them back in your closet at the end of a season, the smell still seems to invade. Over time, remedies such as mothballs and cedar chips have come into existence, but neither is really appealing if you don’t want to smell like chemicals or a hamster cage all day. What are we to do?

Fortunately there is a solution. Follow these steps to keep your clothes smelling springtime fresh, even when you haven’t worn them since last spring:

           Give your Closet a Good Cleaning- First things first, right? To stop the stinky-closet-smell cycle, you must first clean out the closet itself. Purge any items you haven’t worn in one year, and space out hangers for your remaining clothes so they have room to breathe in there. Launder all the clothes you have elected to keep, so you can be sure they start out fresh. If your closet is carpeted, vacuum the floor and get in corners with the crevice tool to remove any dust. If your closet still has that old library sort of smell to it, you may even consider painting to give it that “new” smell.

      Shoo out the Shoes- How many of us really wear all the shoes we currently have in the closet? Since shoes often can be the cause of a musty closet smell, whittling down your shoe collection to only the ones you actually wear can help cut down on odor-causing factors. Once you’ve given the boot (HAHA) to the shoes you don’t wear, wipe down the ones you do wear and sprinkle the insides with baking soda or baby powder. Fresh shoes=fresh closet!

      Absorb the Odor…Naturally- I don’t know about you, but I don’t want to walk around all day smelling like an air freshener dangling from the rearview mirror of a taxi. This is why I elect not to use air fresheners in my closet. Absorbing odor, rather than simply masking it, is a key component of the war on closet stank. Try a natural odor-absorbing agent like coffee grounds, white vinegar, or our good friend baking soda, in a small container with holes punched in the lid. Tuck the container in your closet and you’re all set!

You can take the clothes out of the closet, and you certainly CAN take the closet out of the clothes! Once you’re done making your closet odor-free, you’ll notice a big difference in the way your clothes smell, which can really make a difference in the way you feel!


Monday, April 18, 2016

Make Your Shower Doors Sparkle!

The look of a frameless stall shower with glass doors can give your bathroom an instant update. Gleaming glass shower doors make your bath look like it belongs in a 4-star hotel, and is an elegant and modern choice for a bathroom remodel. But how do you keep those shower doors sparkling clean with everyday use? Streaks, water spots and soap residue can turn your beauty of a shower into a bathroom beast in no time at all! Fortunately we’ve got the solution to clean shower doors that last. 

Here’s what to do:
Give your shower doors a vinegar bath. Step one is to remove all existing buildup, streaks and spots on both the inside and outside of your glass shower walls and door. A thorough cleaning with good old-fashioned white vinegar will do the trick. Apply vinegar to a damp cloth or sponge and rub down the shower glass in a tight, circular motion, then dry thoroughly with a clean, lint-free cloth.

Use a glass shield. Once your shower is sparkling from the vinegar, it’s time for Step 2. Use a product that shields glass from water spots and stains. We recommend Clean-X Invisible Glass Shield Shower Door Formula. Apply a little of the glass shield to another clean cloth and rub in a circular motion over all the glass surfaces of the shower, inside and out. When it dries, it will appear hazy, almost like it is fogged up from steam. Spray down the surfaces with a spray bottle of water, then use a clean cloth to rub the haze away in a circular motion.

…And that’s it! The glass shower doors will look brand new! Best of all, the glass shield is designed to repel water, soap residue and hard water stains for up to 6 months before it is necessary to reapply. To keep your shower doors looking their best in between glass shield applications, purchase a squeegee to use after each shower. It only takes a few seconds and will keep the glass as streak-free and sparkling as the day it was installed!


Wednesday, January 6, 2016

Clean House Tips for Pet Owners


As a nation, we love our pets. Our furry friends make us laugh and give us constant companionship and unconditional love. We don’t, however, have to love the messes, odors and disorganization that pets can bring to the table when we open our homes to them. Here are a few cleaning tips for pet owners who love a tidy house as much as they love their four-legged fur babies.


Minimize the hair issue. Dogs and cats shed- a lot. Unless you have a breed that doesn’t shed, chances are your house is overrun with pet hair. This can not only make your furniture look shabby and unclean, but can also wreak havoc upon houseguests and family members with an allergy to pet dander. Grooming your pets regularly can cut down on the amount of dog or cat hair that is shed in the house, as can putting a special sheet, towel or blanket down on the spot(s) your pet occupies most often and then shaking off the hair outside before laundering. Of course, nothing cuts through the hair better than a thorough vacuuming- you may wish to invest in a good vacuum cleaner specially designed for pet owners, and give the major areas of your house a good vacuuming at least twice weekly.

Wipe Your Paws. Dogs are known to track mud in from the yard, especially in winter and spring months. To avoid muddy pawprints on your clean floors, keep a towel and shallow container half-full of room-temperature water by the door, and clean your pooch’s paws off as soon as they come inside. Baby wipes are also a practical weapon in the war on paw prints, and can be very effective after a walk through a muddy puddle.

Stains happen. No matter how well you train and care for your pet, accidents are bound to happen. Puppies get excited and forget their potty training. Kitties miss the litter box. Dogs and cats of all ages sometimes get illnesses which cause accidents that can be unpleasant to clean. It is a part of pet ownership that you know about as soon as you sign up. All you can do is learn how to treat pet stains effectively. The best way to deal with fresh stains is to remove solid residue, then blot with a clean white cloth, then apply a solution of one cup lukewarm water and a couple drops of clear dishwashing liquid. Blot dry and repeat steps until the stain is gone.
For persistent stains and odors, I recommend Amaziing Solutions Pet Stain Remover and Pet Odor Eliminator ($19.97, Amazon). When used as directed, this product can eliminate even the strongest odors caused by pet stains on carpets and upholstery. It is by far the finest enzyme-based odor eliminator I have used, and got rid of stains and smells I thought were going to be there forever!

Speaking of Odors… Even when it is not the direct result of a potty accident, pet owners know that there is a certain “smell” that comes with furry friends. Candles, plug-in air fresheners and odor-neutralizing sprays such as Febreze can go a long way in making your house smell fresh and pleasant, but please do try to follow the “less is more” approach to camouflaging pet odors with artificial scent. The best way to keep your home smelling fresh and clean is to regularly clean surfaces with lemon, baking soda and vinegar, and to sprinkle baking soda onto your carpet prior to vacuuming.

It’s furniture, not FUR-niture. If you’re like me, you can’t bear to be one of those people who doesn’t allow their pet on the furniture. As far as I’m concerned, my dogs are my family members and are therefore entitled to rest on any bed, couch or ottoman they please. The result, of course, is an endless supply of dog hair on the couch cushions and throw pillows, not to mention the “dog smell” that can arise from time to time. To combat these issues while still allowing your pet to make himself at home, consider purchasing furniture with microfiber or microsuede upholstery. Both of these materials are durable enough to withstand pressure from claws without tearing or snagging, and can be easily cleaned with a damp cloth. Additionally, you may want to take your pet’s fur color into consideration when buying a sofa: true story, when my husband and I were buying our furniture for our first house, I took a few “samples” of my bulldog’s hair and laid it on the couches we were considering to find the color that best camouflaged it.


It’s not easy to have a clean home and a pet at the same time, but it can be done, with a little patience, diligence and consistency. Have any stories of pet-related house disasters and how you cleaned them up? Please let us know in the comments section.

Wednesday, December 9, 2015

Household Hint: How to Get Mildew Smell out of Towels

We’ve all been there- wiping down our countertops or drying off pots and pans with what we believe is a fresh dishcloth, only to have a moldy, mildew smell rise up and smack us in the face. Gross! According to laundry experts, that smell occurs in towels, washcloths and other linens when dirt and grime gets trapped in their fibers, along with detergent buildup, and then left wet for too long, either in a hamper or the washing machine. Before you give up and buy a whole new set of towels, know that there is a cure! Follow these easy steps to restore your towels to their original, mildew-free glory:
Wash towels in special vinegar load- Round up the offending towels and throw them into the washing machine on the hot setting, along with one cup of white vinegar. Make sure to wash like colors together to minimize the risk of bleeding. DO NOT add detergent or bleach. Once the cycle completes, toss into the dryer as usual and get ready to enjoy folding some delicious-smelling towels. If a little bit of stank remains, don’t fret- just repeat the steps above, this time using ½ cup baking soda instead of the vinegar. This step is necessary for severely mildewed towels.
 
Wash your washer- Now that you’ve cured your towels, you want to prevent the mildew from ever coming back. One of the ways to accomplish this is to wash your washing machine. Running a monthly cleaning cycle with one of the many specialty washing machine cleaners on the market, such as Tide and Affresh, is effective, but running a normal cycle with hot water after adding bleach to the dispenser can kill just as many germs for a lot less cost.
 
Improve your laundry habits- OK, so now your towels and washer are both clean, fresh and free of odor-causing bacteria. Now all you have to do is keep them that way! One quick and easy way to remedy the mildew issue is to remove clothes from the washer promptly, rather than letting them sit there for hours before putting them into the dryer. Additionally, consider hanging wet towels and damp washcloths over the shower curtain rod or towel rack to dry before tossing them into the hamper. And always leave the lid or door to your washer open to allow air to circulate and dry out any moisture. These preventive measures are especially important if you live in a humid climate, where everything takes longer to dry properly.

Keep Your Fridge Clean- Easy Tips for a Busy Life

If you know me, you know I’m a person who likes to keep things clean. I especially pride myself on a nice spic-and-span kitchen, with the stainless steel appliances and kitchen island wiped down to perfection. Imagine my horror, then, when I looked into the fridge this morning and realized…I’m one of those people with a disgusting refrigerator!
Don’t get me wrong- from the outside it’s picture perfect. Streak-free, no fingerprints, everything tidy right down to the tray under the water and ice dispenser. But open the doors and suddenly you’re hit with spilled juice dribbles, white rings from underneath the milk jug, a streak of hot sauce from a once-mighty breakfast burrito and what has to be three weeks’ worth of suspect-looking Tupperware full of leftovers I’m frankly afraid to view. How did this happen to me?
Fear not, fellow Type A neat-freaks: you’re not alone. Cleaning out your refrigerator can be a simple task that you can do once a week to stay on top of the accumulation and basic grunge of everyday living. For the big jobs, follow this link for a handy checklist from Real Simple on how to give your refrigerator a deep cleaning in only 20 minutes, but you can also just follow these handy tips for a 5-minute weekly spot-clean sure to keep your refrigerator fresh, clean and free of nastiness.
 
Clean the fridge on Trash Day- This way you can just pitch all the questionable looking fruits, veggies and meats that are past their use-by date right into the bin and take it straight out to the curb. No stinky garbage to contend with! Also, if you’re like me and prefer to use the disposable food storage containers instead of the pricey, reusable kind, you can just toss any containers you’re scared to open right into the trash too, avoiding a run-in with your gag reflex.
Windex is your friend! -The shelves on most modern fridges are made of tempered glass, making a glass cleaner like Windex the ideal cleaning agent. Clear the shelves one at a time, top to bottom, and clean with a cloth sprayed with Windex. (Don’t actually spray the Windex into the fridge, as it might contaminate any uncovered food on the lower shelves.)
Baking Soda, Baking Soda, Baking Soda!- This wonder substance can be used to freshen and deodorize virtually anything, but its ability to keep odors from forming in the refrigerator is really what put it on the map as a household cleaning staple. These days you can even buy baking soda in a fridge-friendly pod that suctions right to the inner fridge wall! I prefer to go old-school with a nice 50-cent box of Arm and Hammer with the top ripped off. It’s cheap, it’s effective, and it makes all the difference. (Just don’t use the same box of baking soda that you have open for deodorizing in, say, a cookie recipe, because that’s just gross.)
Time to shine!- Now that the inside of your fridge is all spiffy, make the exterior gleam with a mix of equal parts white vinegar and water in a spray bottle. This keeps the stainless steel streak-free and squeaky-clean without any residue or buildup. For extra disinfecting power, run a cleaning wipe down the door handles, where germs love to hide. I like Clorox Wipes myself. An alternative to the water-vinegar combo if you’re really in a hurry is a Mr. Clean Magic Eraser. Not only does it take about 17 seconds to clean the whole outside of the fridge, but it also leaves behind minimal residue, keeping your fridge from looking dull.
What’s the scariest thing you’ve ever found in your fridge? Let us know in the comments below.