Showing posts with label Kitchen. Show all posts

Tuesday, September 11, 2018

NEW Striking Cafe Appliance Color Combos 2018

Richard is here today to talk about the new and exciting Cafe appliance line up. The new lineup has new colors and accessory colors to add style to your appliances which will make your custom kitchen one-of-a-kind.


GE Cafe has always been big with an industrial look with powerful ranges and refrigerators with plenty of space and  Keurig K-Cup brewing on the door. With the new Cafe lineup they are changing the game and showing us how your appliances can have personality with style.

There are two main color options, matte black and matte white. The matte black color is great for rich and Earthy toned kitchens.The matte white can give an elegant feel to the kitchen and can match any color in the room.


The really neat thing about this series is that there are 4 hardware finish options:
  • Brush Copper- The warmth of copper without too much gleam gives your appliances a rosy glow.
  • Brush Bronze- Bronze is back. This muted version mixes well with almost any color palette.
  • Brush BlackSleek and moody, this black has a slight sheen to make your appliances shine.
  • Brush StainlessA gentle shimmer of stainless steel sets a subtle, modern kitchen mood.
You can now change the handles and knobs on your appliances to match the rest of your kitchen hardware. These options can make your appliances speak loud with more contrast and can give your appliances a custom look. The other great thing is that you can change them out when ever you want. There is also a small copper cuff on the handles with their logo on it that just completes the look.

Stop by one of our stores today to check out how awesome the new Cafe appliances are. They will make you want to rethink your whole kitchen design!

Tuesday, July 10, 2018

What's Best: Counter Depth or Full Size Refrigerator


Kevin Drako is here today to explain the difference between counter depth and full size refrigerators.

If you look closely at your current refrigerator, you may notice that it sticks out beyond the counter. Most refrigerators are like this and is called full size or standard depth refrigeration.

Counter depth refers to where the refrigerator alignment with the counter tops. This means that the refrigerator front is flush with the counter that is next to the refrigerator. The only thing that will stick out is the doors when you open it all the way. This option is all about looks and people that might be particular about things lining up just perfectly. The disadvantage with this refrigerator option is that there will actually be less usable space in the refrigerator and the cost of counter depth is usually more than standard depth. You may want to consider counter depth if you have less room in your kitchen as it frees up space.

Stop by one of our stores to see the difference yourself and to decide which options is best for you.


Tuesday, July 3, 2018

The Difference Between French Door vs Side-By-Side Refrigerator

Kevin Drako is here to show you a few things to consider when deciding if a French door or side-by-side refrigerator is best for you and your family.


The great thing about both units is that French doors and side-by-side refrigerators both have options of having a water and ice dispenser in the front with control panels. Both have options to not have this in the front. The other great thing is that both units come in different finish options. You can match your other appliances with different colors such as white, black, stainless steel, slate, black stainless steel, and more. 

The big question that you should ask yourself is "does my family eat more frozen foods or fresh foods"? This question can determine if you need a unit with more freezer space or refrigerator space.

If your family makes a lot of big dishes with over-sized baking trays, you will need that extra room in your refrigerator and a French door option might be best. If you eat tons of sandwiches and pack on a bunch of meat, cheese, and veggies the deli pantry and refrigerator doors in a French door might be very useful for you. If you eat tons of fruits and veggies (like your suppose to) and more natural foods, a French door is going to be a great choice.

On the other side, if your family makes a lot of frozen foods such as frozen pizza, lasagna, or other frozen meals, a side-by-side might be a better option. With a French door, you have to stack your frozen foods on top of each other, making it hard to reach things or even see some of the foods that you have in your freezer. You may also get into situations where you have to bend over or get on your knees to maneuver through the things in your freezer.

If you have children, there are a few things to consider. If you want them to learn how to be independent and grab their own snacks and help out with dinner, think about how tall they are and that it might be a little harder for them to get things that are in a French door fridge. A side-by- side is nice in that you can see and grab things from both the freezer and refrigerator side equally and more easily than a French door. You can also see and grab all of the frozen foods a little more easily.

Can you fit a frozen turkey in a side-by-side? Maybe a small one, but probably not a big one. You may want to consider having a chest freezer in the garage or basement. If you have a side-by-side and make a big casserole, you might not have enough room to put it in your fridge and may consider getting a second fridge and keep it in the garage or basement. If you choose a French door, you might need more freezer space and need to get a chest freezer or second fridge.

The options are endless. After watching this video which option is best for you and why? If you have more questions, stop by one of our locations and we can answer any additional questions or concerns you may have. It's always best to see these options in person.

Tuesday, April 10, 2018

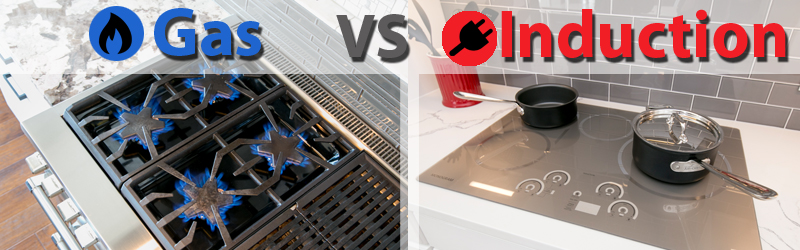
Convert to Gas or Induction? The Choice Is Yours


Many people come into the store wanting and dreaming of converting to gas.  A lot of times this involves a big kitchen remodel project and can come with hefty costs.  There is a great alternative to the time, money, and effort that this takes to switch to gas.  Welcome to the world of induction ranges!


Take a look at the pros and cons of both and it will help you determine which option is best for you.

Gas Ranges
Most professional chefs prefer cooking on gas. Once ignited, the burners respond faster and you do not have to wait for the burners to warm up with conventional electric cooktops or ranges. They are also a little bit easier to clean and maintain. With electric, there seems to be a huge mess after cooking and you have to clean it with a special product and elbow grease. With gas, you just have to remove the steel grate and wipe the crumbs and food way more easily, but not as easily as induction. Gas allows you to use different types of cookware and have your food cook pretty evenly and keeps your pans flat-bottomed.

Benefits of Gas
  • Better control
  • Fast boiling
  • Can use different types of cookware

Drawbacks of Gas
  • Tougher cleanup than induction
  • High cost of conversion
  • At altitude the effectiveness is reduced
  • Can have a gas leak

Top Gas Choices
Ranges


Cooktops


Induction Ranges
An induction range uses electromagnetic field to heat pots instead of radiant heat that standard electric ranges have. You have to make sure that you have the correct cookware for it to work properly which is magnetic or induction-capable. With induction, your cooking time can be reduced dramatically. The technology allows you to boil water 2 to 4 minutes faster with 6 quarts of water. The surface of induction cooktop stays cooler than the standard smooth top. This will make cleaning easier. Don’t get me wrong, your pot will still get very hot, but with the heat transfer technology, the surface below and around the pot won’t get as hot. Once you take the pot off the heat element, the heat stops and the surface won’t be super hot making it a very safe option, especially if you have kids.
Benefits of Induction
  • Boils water in less than 90 seconds
  • Better control than gas
  • Easy clean up
  • Safe option
  • No conversion or remodeling needed

Drawbacks of Induction
  • It just doesn’t have the flame
  • You need specific cookware
  • There is a buzz sound
Induction Choices
Ranges

Cooktops


Tuesday, February 13, 2018

How to Install a Range Safely & Properly!

Dustin is here to show you how to install a range in these 5 simple steps.

This is a great video to DIY installing your own range. Please be careful when doing this yourself. Use gloves and have a friend help you.


1. Install the 4-prong cord. We recommend using the 4-prong rather than a 3-prong so that you have a ground wire. Match the different cords with the same cords on the range.

2. Install the anti tip brackets. This is a required safety feature that keeps the range from tipping over. This is helpful if someone leans on the range. These brackets would help them from having the range fall on them.

3. Place the range in the location. We recommend using straps so that you do not scratch the floor and to give you support. Once it is in the spot, make sure that someone helps you plug it in before sliding the range completely into the spot.

4. Level the range to the countertop. Pull the warming drawer out and adjust the back feet first so that the range is at the same height level as the countertops.

5. Place the warming drawer back into the range. You should be all set for using your range.

If you have any questions or need help, please let us know.

Wednesday, January 17, 2018

Start the Year Off Right With an Organized Kitchen!

 The hustle and bustle of the holiday season is over for another year, giving you a much-needed break from the kitchen! If you found yourself feeling extra stressed this holiday season when baking Christmas cookies, cooking large family feasts or hosting your annual get-together, your kitchen’s organizational system may be to blame. Now’s the time to get your kitchen in order for a more Zen experience and figure out systems that work best for you when you’re in a high-pressure cooking or baking situation. Here are a few tips for minimizing kitchen clutter, optimizing your counter space usage and getting rid of anything that you haven’t used in a while (or ever) to make room for the things you need every day.

Delete Duplicates

When a couple gets married or moves in together, the chances of having duplicates in your kitchen increases. Suddenly you find yourselves with two of everything: toasters, coffee makers, blenders...you get the idea. The possibility of owning more than one of every small appliance gets even greater when the wedding gifts start rolling in from well-meaning friends and relatives. While it can be hard to part with the Mr. Coffee that kept you sane through all those all-nighters in college, or give away the lookalike food processors you received from Uncle Ed, Cousin Jenny and Grandma Sue on your wedding day, you’ll be much happier when you whittle down your kitchen appliance collection to just one of everything.

Play “Sell, Toss, Donate” With Kitchen Items

Be honest, have you ever used that waffle maker that’s currently taking up valuable real estate on your kitchen countertop? How about the enormous bread maker you bought at a garage sale during your homemade baking phase? If you haven’t used a kitchen appliance in a year or longer, consider selling it on Craigslist or eBay or donating it to Goodwill or another charity-based thrift store. Any kitchen appliances that are beyond repair or are unsafe to use should be disposed of responsibly. Getting rid of appliances can be hard when you think you’re still going to need them one day, but you’ll be rewarded with a sleek, clutter-free kitchen that cuts down significantly on everyday stress.

Devise a System- and Stick to It!

Most of us already have designated cabinets and drawers for the things we need and use everyday in our kitchens. However, when life gets in the way, it can be difficult to stick to an organizational system and put things back where they belong after each use. If you find that your current system is hard to remember or doesn’t make sense to you, maybe it’s time to do a complete reorganization of your kitchen to help you make the best use of your counter space, utensils and appliances.

A new year can be a fresh start- why not begin with your kitchen? By following these organization tips, you can turn your kitchen into an inviting, clutter-free space that inspires creativity, conversation and happiness!


Monday, December 18, 2017

A Great Cooking Option for the Holidays- Samsung Range Review

 It’s that time of year again where we all move our cooking back indoors and cooking for tons of people.  With the Holidays coming up, you might be considering a new oven for your kitchen.

 Today I would like to introduce to you the Samsung NX58H9500WS.


 Thinking out the cooktop this is a game changer for very big meals. This unit features a Hi-Performance 5-Burner Cook-top. This allows you to cook your food on top with flexibility with how fast you would like to cook things and the convenience of cooking over-sized pots and pans with the oval burner. With 18,000 BTUs you can get a rapid boil. This range also includes a cast-iron griddle, Wok Ring, and a 22k BTU Tri-Ring burner.   There are also grate indicator marks to help you place your pots and pans in the perfect spot to get the best cooking performance.

The oven provides more features that can help with cooking for the holidays. The True-Convection oven offers the most consistent oven temperatures throughout which helps make your food cook more evenly and makes every bite tastier. The internal meat probe helps ensure the proper internal temperature for your Holiday Roast or Turkey.  The oven is brightly lit with halogen lighting so it is always easy to monitor the status of your baked goods. The guiding light controls have a digital display that makes it easy to follow step-by-step instructions on how to cook certain foods and program your favorite recipes. The oven’s size is 5.8 cu ft which is large enough to handle that bigger turkey at the store or cook multiple big dishes at once. At the bottom, this range has a warming drawer. You can keep some foods in here until everything is ready to eat at dinner time.

Come see us today at one of our 17 locations, we can show you this convection range and many more like it to compliment your Holiday Cooking Season.


We hope to see you soon.

Tuesday, October 10, 2017

Recipe- Classic Butternut Squash Soup

When leaves start to fall and the night air gets crisp and chilly, nothing warms you up like a delicious bowl of butternut squash soup. Make this fall favorite for dinner tonight!

Ingredients:

  • 1 large (2-3 lbs.) butternut squash, peeled, seeded, and cut into 1-inch cubes
  • 1 large (8 oz.) carrot, peeled and cut into 1-inch chunks
  • 2 tablespoons extra-virgin olive oil
  • 7 tablespoons unsalted butter, divided
  • 1 large yellow onion, thinly sliced
  • 4 medium cloves garlic, thinly sliced
  • 4 cups homemade or store-bought low-sodium chicken or vegetable stock
  • 2 sprigs fresh thyme
  • 1 bay leaf
  • Kosher salt and freshly ground black pepper
  • 3/4 cup heavy whipping cream
  • 1/4 cup sour cream
  • Pinch ground cinnamon
  • Pinch nutmeg
  • 20 fresh sage leaves (optional)


Directions:
1. Preheat oven to 425°F. Toss squash and carrot with olive oil and arrange on 2 rimmed baking sheets, being sure not to overcrowd the sheets. Roast until squash and carrot are very well browned on a couple sides, about 40 minutes; use a thin metal spatula to turn pieces two or three times during cooking. Set aside.

2. In a large saucepan, cook 2 tablespoons butter over medium-high heat until just starting to brown. Add onion and garlic, lower heat to medium, and cook, stirring, until soft and lightly golden, about 10 minutes; lower heat as necessary to prevent burning.

3. Add squash and carrot to saucepan and remove from heat. Pour 1/2 cup stock into each baking sheet and scrape up any browned bits, then pour into saucepan. Add remaining stock, thyme sprigs, and bay leaf and return to medium-high heat. Bring to a simmer, then lower heat and simmer until vegetables are very soft, about 10 minutes. Discard thyme sprigs and bay leaf.

4. Using a blender or stick blender, blend soup until completely smooth. Season with salt and pepper. Return soup to saucepan and thin, if necessary, with additional stock until desired consistency is reached. Keep warm.

5. Using a stand mixer, handheld mixer or whisk, beat cream and sour cream with cinnamon, nutmeg, and a pinch of salt, until stiff. Set aside.

6. If making sage leaves for garnish, melt remaining 5 tablespoons butter in a small skillet over medium-high heat, swirling gently, until foamy and just beginning to brown. Add sage leaves, swirling to submerge and cook until frizzled, about 15 seconds. Using a slotted spoon, transfer sage to a paper towel to drain. Sprinkle very lightly with salt.

7. Ladle soup into warmed bowls, spoon dollops of spiced whipped cream into each one and top of frizzled sage, if using. Serve right away.

Prep Time: 1 hour 15 mins | Cook Time: 30 mins | Makes 2 quarts (6-8 servings)


What’s your favorite autumn recipe? Share it with us in the Comments section.

Friday, September 22, 2017

Tips and Tricks, how to make pesto

Pesto, it's not a paste and not a sauce. It's on it's own level.

In this video, Chef Mark gives some great tips onto how to make your own pesto at home. He uses a food processor to cut up the Basil. Make the roasted garlic at 450 degrees for 45 minutes to get that amazing flavor.


Items used in pesto:
Roasted Garlic
Extra Virgin Olive Oil
Pine Nuts or Almonds
Basil
Mint
Chives
Cheese (optional)

What other items do you use to spruce up your pesto at home? Leave them in the comments section.

Friday, September 8, 2017

Cooking with Chef Mark: How to Cut Potatoes Using Bridge Grip


Chef Mark is here today to teach you how to cut potatoes with his bridge grip knife tip. Make sure to bridge over your rounded vegetables like potatoes. Once you have cut the potato in half, use the flat side on the cutting board and use the forward rocking motion with your guide hand. Slice forward and make sure to make your cuts about the same length for even cooking times. You can use this method with other rounded or awkward shaped vegetables and fruit.

Leave a knife cutting question in the comments section to improve your knife skills.

Friday, August 4, 2017

5 School Lunch Ideas for Even the Pickiest Eaters


It’s that time of year again- time to stress out about packing your kids healthy lunches they’ll actually eat! Fear not- we have compiled a list of surefire nutritious meals and snacks that pack up well in a Bento box and have the seal of approval from the pickiest eaters around!


1. DIY “Lunchables”- A healthy spin on the popular but sodium- and preservative-filled pre-made snack boxes, these homespun twists on a kid favorite are sure to win lunch! Some thin-sliced deli ham, turkey or roast beef cut into small squares, thin, square-cut slices of cheddar, gouda or colby jack cheese, a small handful of baked low-salt crackers and a chewy peanut butter and chocolate granola bar will be a fun-to-eat lunch that packs a protein punch!

2. Yogurt Parfait- In a small plastic container, layer fat-free vanilla yogurt, granola, strawberries and blueberries, then repeat the pattern twice. Sprinkle with granola as a garnish, and refrigerate until it’s time to serve. Your child will love the look and taste of this healthy snack! (You can even substitute other fruits for variety. Don’t be afraid to get creative!)


3. PBJ “Sushi” Rolls- Want an exotic twist on a tried-and-true favorite? Make your kids’ peanut butter and jelly sandwich into small, sushi-inspired rolls! Simply cut crusts off of whole-grain bread, slather with peanut butter and grape jelly or strawberry preserves, roll up and cut for a next-level PBJ experience! For extra credit, pack it with disposable chopsticks so your child can have fun trying to pick up the sandwich rolls.

4. “Dippy Picnic”- There’s not much kids love more than eating with their hands. Why not let them go nuts with a “dippy picnic” snack? Pack pretzel rods, apple slices, baby carrots and celery sticks in a Bento box, along with mini containers of peanut butter and hummus. Then let the dipping madness ensue!

5. Go Bananas!- Give your little monkey a delicious, nutritious snack with these tasty, protein-rich banana roll-ups. On a small flour tortilla, spread a layer of peanut butter, then drizzle with Nutella. Roll up a peeled banana, and either cut into small finger-food rolls or give it to your child whole. For an added crunch, use chunky peanut butter for texture!

Any great suggestions for kids’ lunches? Let us know in the comments section!


Tuesday, July 25, 2017

3 Back-To-School Organization Tips

It’s hard to believe, but summer vacation is nearly at an end. It’s just a matter of time before the little ones are off to school again for a brand new year! If you’re still catching your breath from the hectic morning rush to get the kids to the bus stop, now may be a good time to tweak your routine so you and the kids can stay a little more organized this school year. For smooth sailing from Day One to Day DONE, here are some of our favorite back-to-school organizational tips. Enjoy!

1. Lay Out a Week’s Worth of Clothes- Save time and a whole lot of drama by skipping the morning “nothing to wear” crisis and planning ahead! Every Sunday, when all the laundry has been done, put together an outfit for each day of the school week, and group them together in your child’s closet. Getting dressed will now be as easy as pulling clothes out of the corresponding day’s drawer or hanger! If your children are older, invite them to help choose their outfits so they have some input.


2. Establish a Good Night Schedule- In order to do their best at school and stay healthy, your kids need at least 10 hours of sleep per night. Check out this handy bedtime chart from Wilson Elementary School to determine an appropriate bedtime for your kids, based on their ages and what time they need to wake up:


3. Keep Everything in One Place- Designate a countertop, small table or desk in your home as the Information Center for all things school-related. This includes your kids’ school calendars, after-school activity schedules, homework, school supplies and permission slips. This all-in-one solution will help you avoid a last-minute dash around the house looking for your child’s homework!


If you have any more organization tips for starting the school year right, we’d love to hear from you- post your comments in the section below!


Tuesday, July 18, 2017

8 Tips for Surviving a Kitchen Remodel

It’s finally happening- you are getting the kitchen of your dreams! For all gourmet cooks (and those who aspire to be), a kitchen remodel is the beginning of many exciting culinary adventures. However, before you can fire up your fancy new Viking range, you need to find a way to cope with the stress and inconvenience that comes along with upgrading your existing kitchen.
It takes a little creativity and a LOT of planning, but it is possible to still dine at home in the midst of a kitchen renovation. Here are a few helpful tips to guide you through the construction period as smoothly as possible.


1. Understand the Timeframe
 Discuss a timeline with your contractor to get a realistic estimate of how long you will not be able to use your kitchen. Make sure to find out if you can use parts of the kitchen for some of the renovation period, or if the entire area will need to be avoided. With these details in mind, develop a workaround for the areas which can still be used, if any. Is there space for the fridge to be plugged in until the flooring needs to be replaced? Will you still have access to the kitchen sink when the contractors have left for the day? Just remember that renovation can be a messy business and you may want to seal off the kitchen from the rest of the house until the remodel is complete.

2. Set Up a Temporary Kitchen
 Even if you’re planning to eat out at restaurants for the majority of the renovation, you still may wish to have an area in which you can make a morning cup of coffee or toast a bagel. You can set up a temporary kitchen space in a garage, basement or corner of a downstairs room, such as the family room. If you have an area with a wet bar or a utility tub, that would work well for any dishes that may need to be washed. Make sure there are plenty of available outlets for the appliances you may wish to plug in.

3. Stock Up
During your kitchen remodel, be sure to buy items like canned soup, cold cereal, breakfast bars and frozen meals that you can eat conveniently and relatively easily at home. You may also want to check into prepared foods at your supermarket’s deli for meal ideas- you will be amazed at the quality and variety of the foods they offer! Cooking meals ahead of time is another good option, provided you still have access to a microwave and a freezer during the remodel. Save yourself the headache of doing the dishes and buy disposable tableware until your renovation is complete.

4. Pack it Away…or Don’t
 Before the remodel is scheduled to begin, take the time to carefully pack up the contents of your kitchen. This is also a good time to purge any items you never use (hello, breadmaker wedding present!) and any duplicate, broken or mismatched items you may have. Don’t forget to set aside any utensils or appliances you may still need on a daily basis during the remodel.

5. Protect the Rest of the House
 Aside from the kitchen, think about the other high-traffic areas of the house that need to be protected from construction dust and workers walking through all day. Drop cloths can be laid down on the floors to protect carpet from stains, and breakable items such as pictures, sculpture and knickknacks, should be removed from any walls or shelves that could be accidentally bumped when cabinetry or appliances are being moved in.

6. Take it Outside
 If you are doing your kitchen renovation during the warmer months, your outdoor grill and patio table serves as a wonderful substitute for the kitchen. You can use your grill to roast veggies, bake pizza and make foil-packet dinners like you did at camp as a kid. With the addition of a picnic blanket and some s’mores, you and your family will think of the kitchen remodel as a fun adventure instead of a burden or inconvenience.

7. Don’t Forget Fido
 If your pet is used to his food and water bowls being in the kitchen, start moving his bowls to an alternate location about a week before the remodel begins. This will help them get used to eating in a different place. Also, if your pet is constantly underfoot or especially anxious around strange people and noises, be sure to keep him away from work areas at all times.

8. Get Away From it All
As long as you’re OK with leaving your kitchen remodel contractors in the house without you there, this is an ideal time for a family vacation, camping trip or long weekend at the lake. Being away from the remodel will not only recharge your batteries, but you will be amazed and surprised by the progress the remodelers have made upon your return.

All of you who have done a remodel, what other tips can you give? If you are about to do a remodel, what questions do you have? Leave them in the comments section.

Thursday, July 6, 2017

Recipe- Sweet Summer Slaw

Be the hero of every barbecue this summer with a delicious coleslaw recipe that tastes amazing with beef brisket and fried chicken alike!          


Ingredients:
  • 1 16-ounce bag coleslaw greens mix
  • 2 tablespoons diced onion
  • 2/3 cup creamy salad dressing (such as Miracle Whip™)
  • 3 tablespoons vegetable oil
  • 1/2 cup white sugar
  • 1 tablespoon white vinegar
  • 1/4 teaspoon salt
  • 1/2 teaspoon poppy seeds
  • Fresh squeezed lemon
  • 1/2 diced up apples


Directions:

  1. Combine the coleslaw mix and onion in a large bowl. Squeeze lemon onto the mix.
  2. Whisk together the salad dressing, vegetable oil, sugar, vinegar, salt, apples, and poppy seeds in a medium bowl; blend thoroughly. Pour dressing mixture over coleslaw mix and toss to coat. Chill at least 2 hours before serving.


Prep time; 15 minutes | Serves 8

Tuesday, June 6, 2017

Cooking with Chef Mark - How to Make Pita Pockets

Chef Mark is here to show you how to make pita pockets with yummy tasting tzatziki sauce.


Here are a couple of ingredients you will need:

  • Pita Pockets
  • Sliced Beef
  • Skewers
  • Plain Greek Yogurt
  • Pickles
  • Garlic
  • Onions
  • Thyme
  • Tomatoes
  • Green Peppers
  • Mint
  • Lettuce
This is a fun meal for the whole family. Enjoy!

Monday, May 29, 2017

4 Smudge-Proof Finish Options

    So, it’s been a while since you’ve upgraded your appliances and you’re thinking that with the Holidays coming up that this might be the right time to do it.  In looking for appliances you will find that while stainless steel is certainly the most popular, and available finish, it may not be the right finish for your household.        
                 
    Stainless Steel, while very attractive, can be a challenge to keep looking great.  Black & White appliances are limited in availability…and may actually cost you more! 

Never fear, new finishes are here!

  There are several new finishes available in a variety of brands that can offer your kitchen a luxurious look, without the luxurious price. Here are 4 different finishes to look into:

 Frigidaire Gallery
  A very “Family Friendly” appliance.  Nice features at an affordable price, with a very popular smudge-proof stainless steel finish. For the families that cook!


Frigidaire Professional
 This line offers a smudge-proof finish, while offering a “Pro-Style” look. For the households that entertain.


LG Black Stainless
This new finish offers an “acid-treated” stainless which is then coated with a smudge-proof outer coating.  Very luxurious and family friendly.


GE Slate
GE offers 90% of their line of appliances in this rich new finish, perfect if you prefer more of a Satin Finish, not a High Gloss.


There are many more options to choose from, I have only listed a few.  Come see us today so that we can show you more options in Samsung and Kitchen Aid, we hope to see you soon!


Thursday, May 25, 2017

Cooking with Chef Mark - How to Sharpen your Knife

You probably have seen a steel before while chefs sharpen their knives. Chef Mark is here to show you how to properly use your steel to make sure you knives in the kitchen stay sharp.


Make sure to keep your knife at a 20 degree angle throughout the whole length of your knife. Hone both sides of your knife to keep your blade even and straight in the middle. Honing your knife 5-6 time is recommended to get the most out of sharpening your knife.

Remember, a sharp knife is a safe knife!

Have any questions about using a steel for honing your knife? Leave it in the comments section.

Friday, May 19, 2017

Chef Mark - Summer Butternut Squash Salad

Learn how to make a simple and healthy recipe for dinners and lunches. Butternut Squash Salad is a great summer option that will make you want more. This is a super simple meal that your friends and family will want to try. Go ahead and cook with Chef Mark today!


Monday, April 24, 2017

Cooking with Chef Mark - How to Properly Hold Knife

Chef Mark is here to show you how to properly hold your knifes while preparing food in your kitchen. Watch the video to learn how to hold your Chef Knife with a pinch grip. Use a forward rocking motion to get the most our of your cutting.


Stay tuned to see more great cooking skills and in particular, knife skills. Care about your food and have great knife skills to impress your guests at the kitchen table.

Saturday, April 8, 2017

What happens when you put Christmas lights in the microwave?

For those of us who are curious we often wonder what happens when you put something in the microwave that shouldn't go in the microwave. See what really happens when you put Christmas lights in a microwave....

Don't try this at home.


The fist microwave was invented on accident in 1946. Dr. Percy Spencer, a self taught engineer, was doing tests on a radar-related research project with a new vacuum called magnetron. After doing a test, he reached in his pocket and found that his chocolate bar was melted. This brought curiosity to his mind and he started doing more experiments testing to heat up popcorn and more. What he had invented changed the cooking game forever. Microwave ovens are now used in almost every household and is a multi-million dollar industry.

To get more of the story, check it out in this article.